Calendly Appointment Booking
Last updated: March 18, 2026
Here you will learn how to connect fonio with your Calendly account so that your AI assistant can directly add appointments to your calendar.
In this article, you will learn step by step how to authorize the Calendly integration, select the correct event, and configure your assistant for automated appointment scheduling.
What you need
An active Calendly account
Your Calendly login credentials (login via email or Google/Microsoft)
A pre-configured event type in Calendly (e.g., "Initial Consultation")
How it works
1. Open fonio and activate appointment booking
Log in to your fonio dashboard and select the desired assistant. Navigate to the Book Appointments section in the assistant settings.
2. Select Calendly as provider
Choose Calendly from the dropdown menu as the provider.
3. Establish connection (OAuth login)
Click the "Connect with Calendly" (or "Connect") button.
A secure Calendly pop-up window will open.
Log in with your usual credentials (e.g., "Sign in with Google").
Confirm the permission request so fonio can access your available times and create new bookings.
After confirmation, the window will close automatically and the connection will be established.
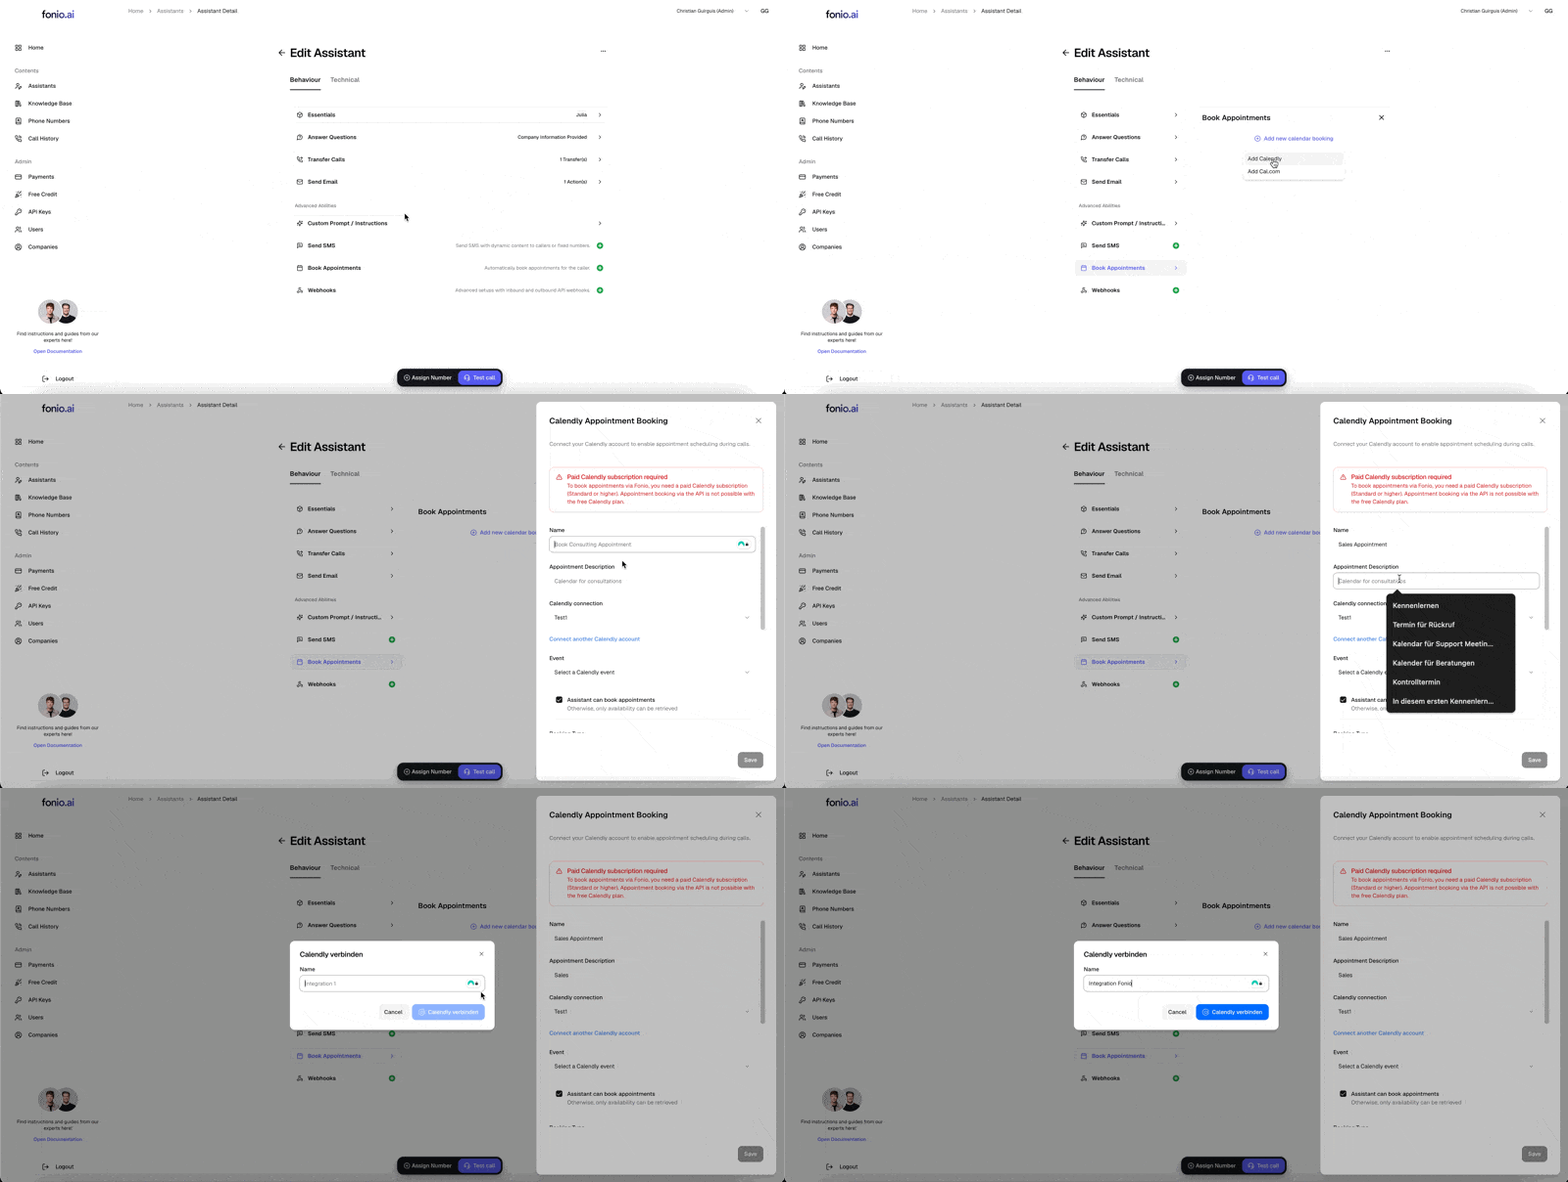
4. Select event type
Once the connection is active, fonio will automatically load your available Calendly events. Select the event that the assistant should book for callers (e.g., "15 Minute Meeting").
Important: Make sure that this Calendly event does not contain any additional required fields (custom questions). The assistant only needs the name and (optionally) the email address. Additional required questions may prevent the booking process.
5. Set permissions and behavior
You can now specify how the AI should act:
Check availability only: The AI only provides information about free slots.
Book appointments directly: The AI completes the booking on the phone.
6. Choose confirmation method
Select whether the caller should receive confirmation via email or SMS. Tip: Confirmation via SMS is usually more efficient since the caller's mobile number is automatically detected.
7. Save and test
Click Save. Then use the audio test function to check the workflow. Simply ask the assistant: "Are you available next Tuesday for a conversation?"